I’m really excited to dive into the latest greatest version of Adobe Premiere Elements 2018 because it has some great new features. One of those is the Fix Action Cam Footage Guided Edit.
Automatic editing for action cameras and GoPro footage is kind of a big new thing these days. It really changes the game for a lot of people… particularly people who are new to creating fun hobby videos, family movies, or GoPro edits. You’re not necessarily trying to win an Oscar. You just want to put all of your best clips together into one video that you can show off to friends and family. Also, being able to relive those experiences again in the future.
Some product links in this post are affiliate links, and VidProMom will be compensated when you make a purchase by clicking our links. Read my disclosure policy here.
GoPro Editing in Adobe Premiere Elements
The folks over at Adobe have added a Fix Action Cam Footage Guided Edit to Premiere Elements 2018. Today, I’m partnering with Adobe to dive into tips and how-tos for editing action cam footage from your GoPro or drone. Following the simple steps in the Guided Edit, I’ll show you the Smart Trim function (which I love). Moreover, how to remove the fisheye effect when you have that super-wide-angle field of view. Lastly, how to color correct your action cam footage. It’s all really simple and easy!
I will probably do a dedicated tutorial on color correction in Premiere Elements 2018 in the near future, but today I’m going to keep it simple. Make sure you subscribe to my YouTube channel to get any and all future Premiere Elements tutorials that I publish. I got more coming at ya, so let’s stay in touch on YouTube!
If you’re totally new to Premiere Elements and video editing in general, I have a cheat sheet that you can print or save to your computer, phone, or tablet for easy reference. This covers the basic steps of what to do when you first start a project and what to do when you’re done. I sprinkled in some of my favorite beginner video editing tips as well. Click here to grab the cheat sheet now.
So let’s dive right into Premiere Elements 2018! Be sure to watch the video tutorial since video editing is easier to watch than reading about!
Related: Removing GoPro Fisheye Effect Using Adobe Premiere Pro
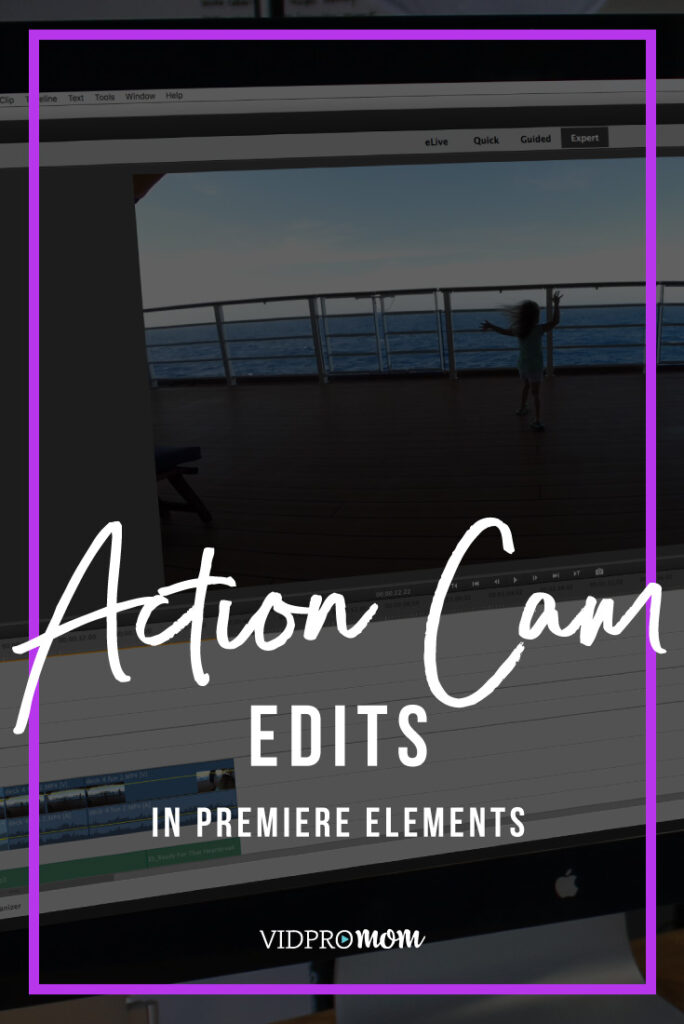
Fix Action Cam Footage Guided Edit – Start Here
I have Adobe Premiere Elements 2018 here on my Mac. If you’re on a PC, don’t freak out–it should look exactly the same. Up at the top, you want to choose Guided, and that’s what we’re going to stick to in this tutorial.
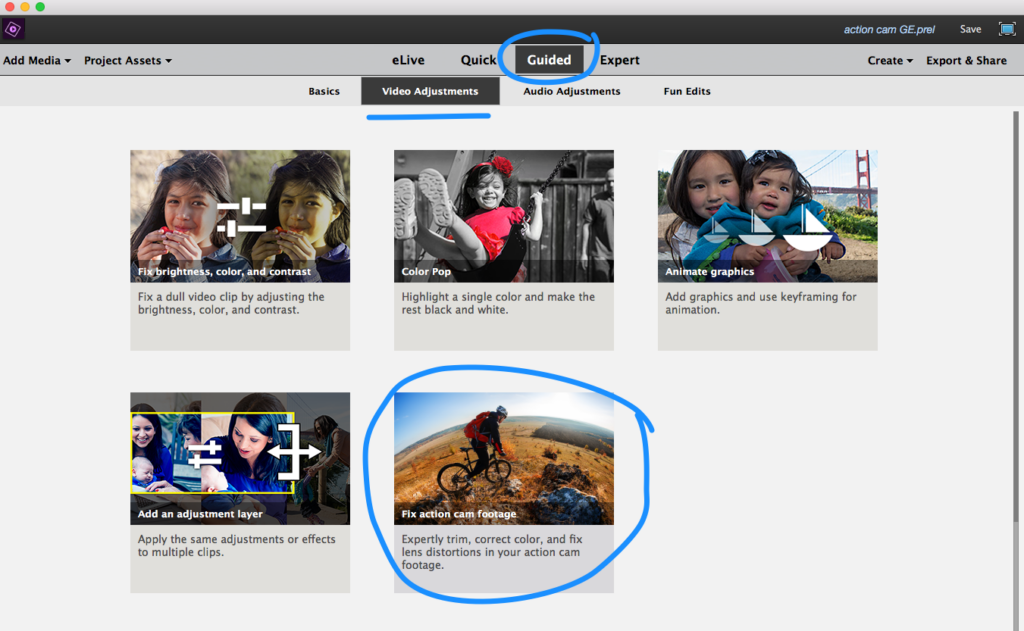
Under the Guided menu, choose Video Adjustments, then “Fix action cam footage.”
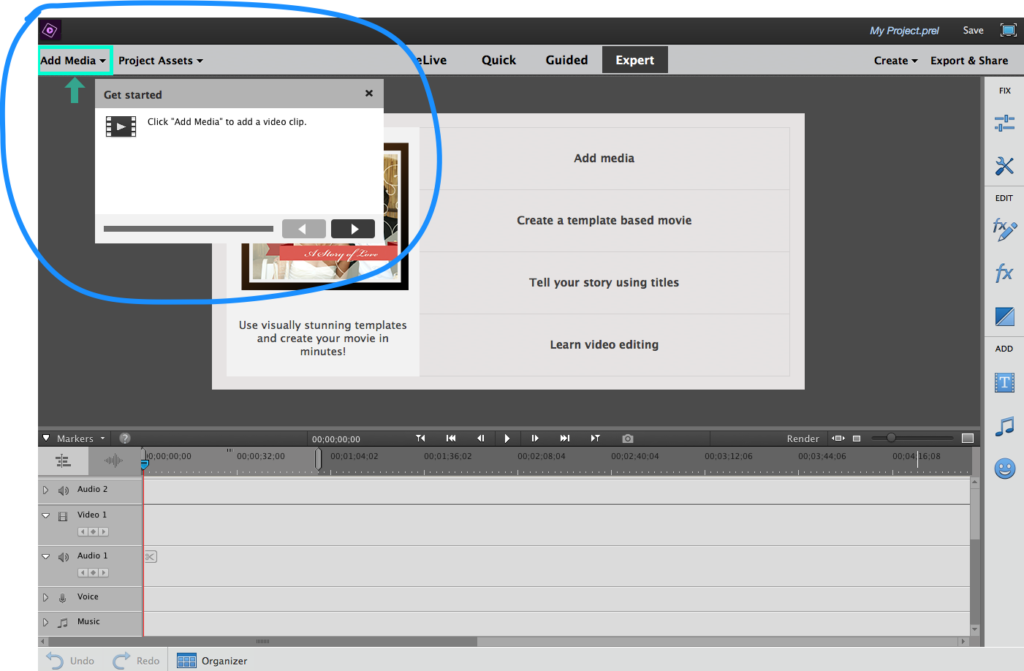
One of the great things about the Guided Edit feature here in Premiere Elements is that it walks you through everything, step by step. It shows you exactly where to click and what to do. You really can’t mess anything up!
Once you select the Fix Action Cam Footage Guided Edit, Premiere Elements will highlight exactly where to click next, and you’ll see a box with instructions. You can see on the left-hand side, it’s telling us exactly what we need to do. We need to add some media to this brand-new project. Once we do that, we move on to the next step in the Guided Edit, using the Smart Trim Tool.
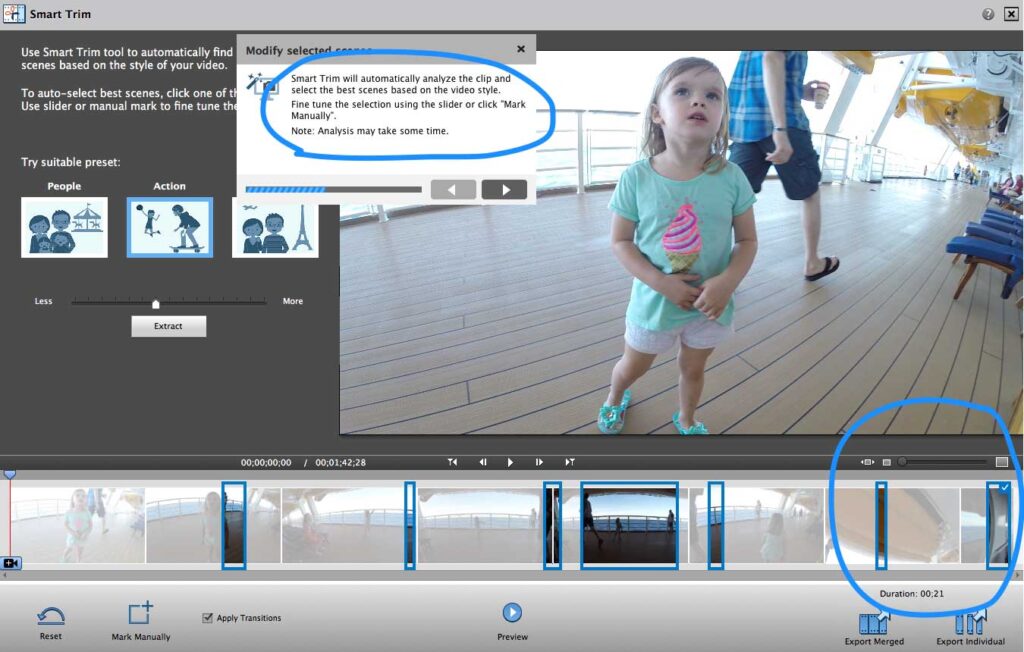
Smart Trim
Smart Trim is easy to use, and you can rely solely on the software to decide what to keep. In addition, you can also choose “Mark Manually” to make your own cuts. Learning how to trim GoPro video clips is just the same as
video clips from your drone, phone, or DSLR camera. Smart Trim isn’t just for action camera footage! I just love this concept for video editing software where you are focusing on the parts of your video that you want to KEEP instead of trying to figure out what parts you need to edit out or get rid of. Other video editing platforms have done something similar to this. However, I really like the way that this concept is implemented into Premiere Elements.
Remove Fish Eye Distortion
Once you’ve completed the Smart Trim, you’ll move on to removing the fisheye distortion in your video. When you select that effect, Premiere Elements will apply the effect automatically, and you can adjust it from there if you need to.
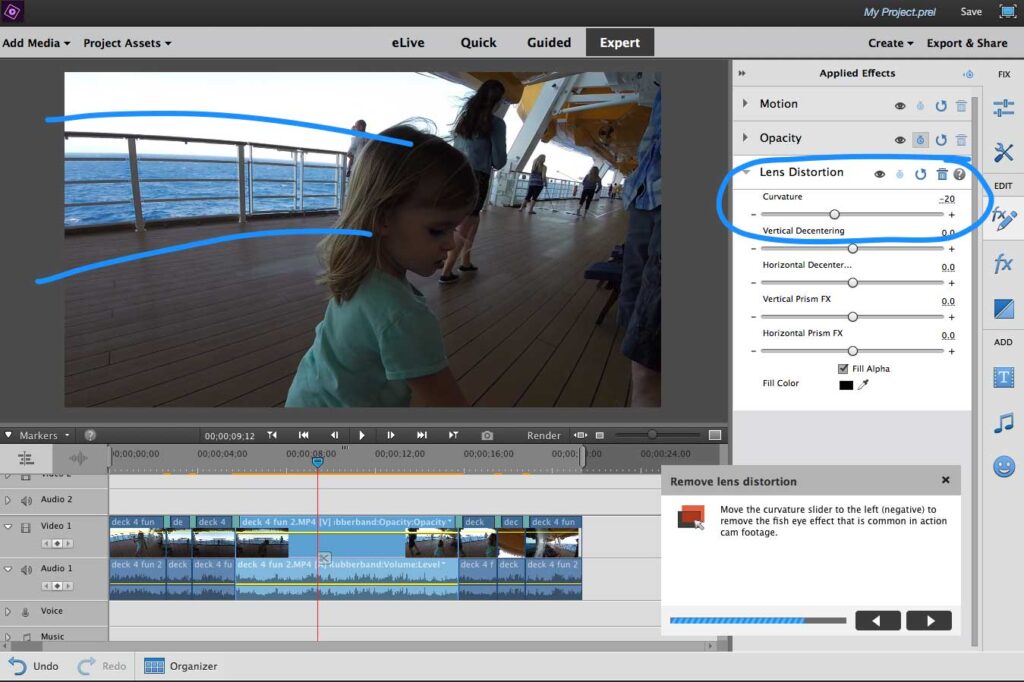
Some people really like that fish eye effect, which is fine… go with what you prefer! I like that there is a slider that you can adjust however you want if you want. Of course, most of the time these days I shoot with a linear field of view, but not all action cameras are capable of that and I have a lot of “fish-eye” footage from my Hero3+ Black that I’m sure I’d love to run through here to get it looking flat.
Color Correction
Once you straighten out your fish-eye distortion, you can move on to color correction. It’s easy to get carried away here, so be careful!
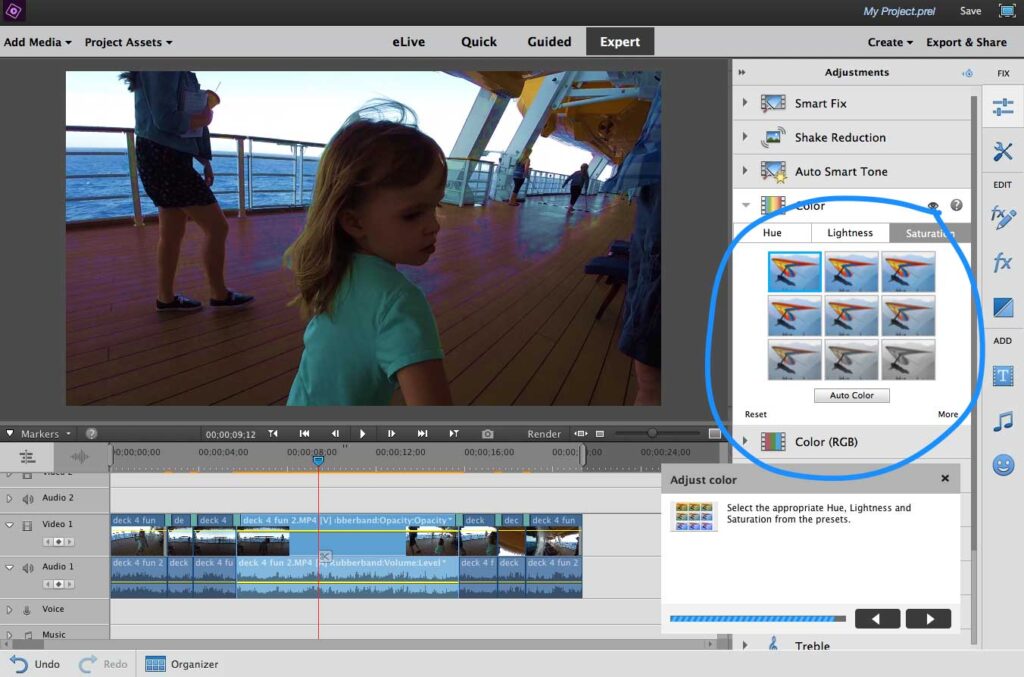
Not all footage needs to be color corrected but a lot of times with action cameras, depending on your settings, you do want to give your colors a little more pop or adjust how dark or light your footage is. Don’t feel like you have to spend a ton of time on this, only use it if you need or want to see what you can do to improve the colors in your video.
So if you haven’t upgraded to the newest version of Premiere Elements yet, I highly recommend it and if you haven’t used Premiere Elements before, you can get a 30-day free trial here. You don’t even have to put in your credit card or anything, just give it a test drive! Follow my cheat sheet, and you’ll be good to go now that you know how to fix and edit your action cam footage using the Premiere Elements 2018 Guided Edit!
Hit me up in the comments below if you have questions about Premiere Elements 2018, and let me know if there are specific tutorials and how-to videos with Premiere Elements 2018 that you’d like to see from me
Related: Which GoPro Video Editors are Best for Beginners?
VIDEO: Editing GoPro Videos in Adobe Premiere Elements