If you’ve spent some time in Premiere Pro editing GoPro videos and getting things just the way you want them, then at some point, you might want to export your GoPro videos in Premiere Pro as well.
Some product links in this post are affiliate links, and VidProMom will be compensated when you make a purchase by clicking our links. Read my disclosure policy here.
Export GoPro Videos in Premiere Pro
Premiere Pro is pretty flexible, but with that flexibility comes some complication. With that, let me break down the settings I use in Premiere Pro and how I export my GoPro videos.
There are about a thousand different settings available for exporting videos in Premiere Pro. In this tutorial, I’m going to try to keep this as simple as possible! Once you have edited your video to your liking and you’re ready to export it, make sure your timeline is selected, and then go to File > Export or hit command+M.
These are the settings I use, every single time I export GoPro videos in Premiere Pro.
Related: Best GoPro Editing Software for Beginners
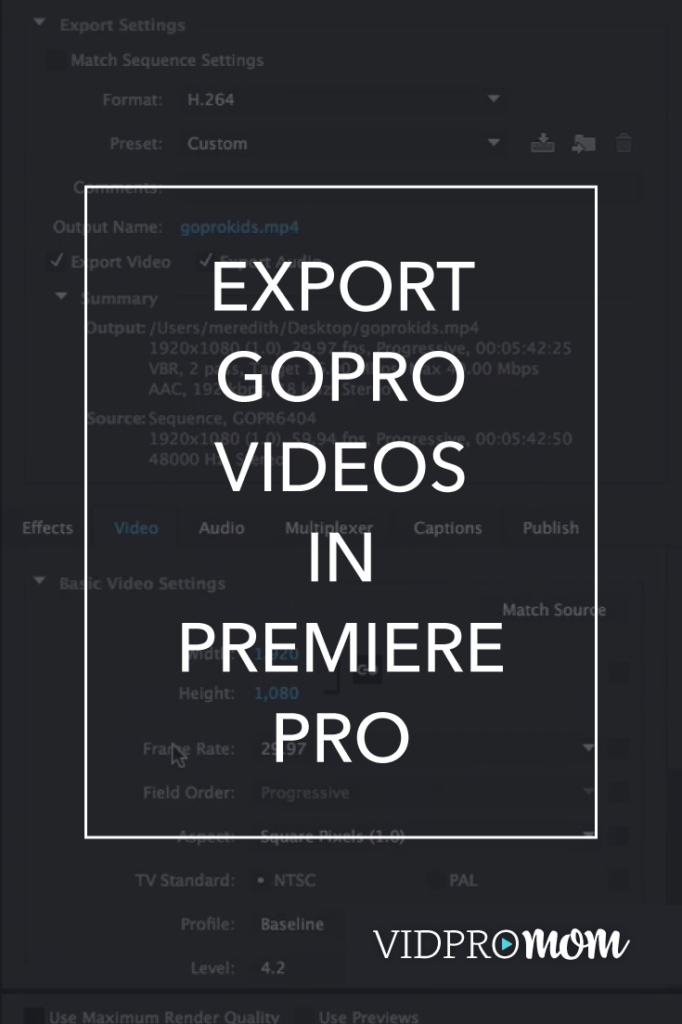
Format
For my video export, I use the H.264 format so that my videos would export as .mp4 files. This is the file type they’ll need to be to upload to YouTube and Facebook, and things like that.
Preset
Since my videos are always 1080p, I would select HD 1080p 29.97 (that’s 30 frames per second). You can also select YouTube HD 1080p. On the other hand, if you want to export your video in 720p or another image size, for example, you will need to select the appropriate one. HD 1080p 29.97 is the one I use.
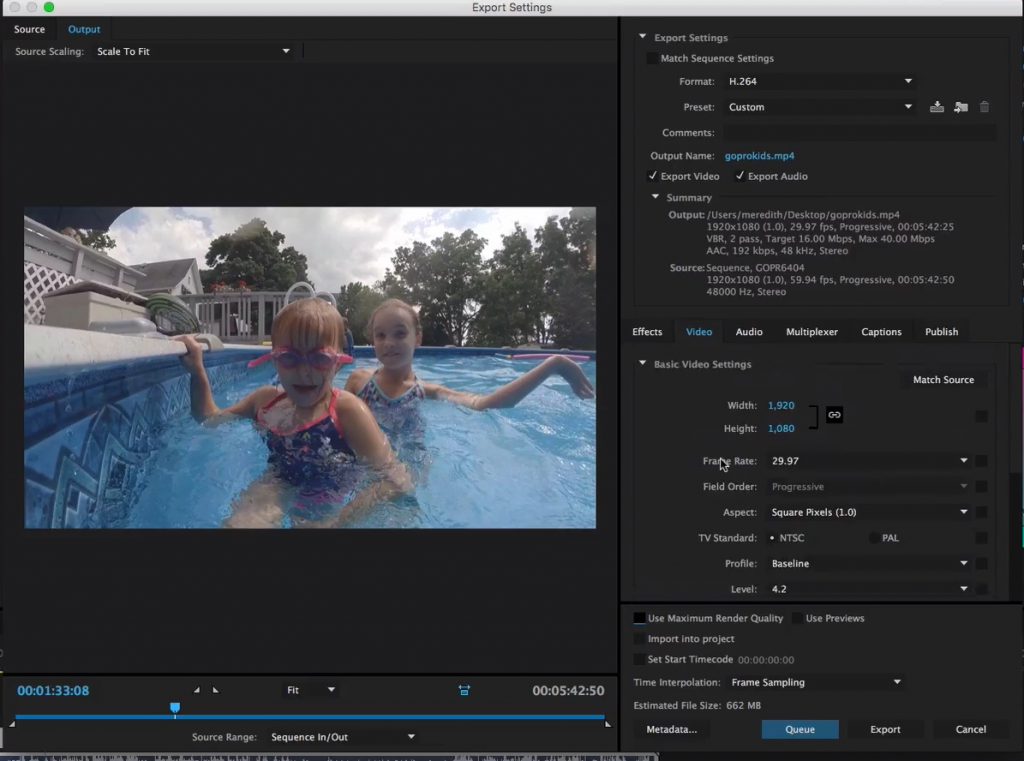
Output Name
This is simply your file name and location. Just hit the name and you can change the file name and location. Also, make sure that the “Export Video” and “Export Audio” checkboxes are checked. They should be both checked by default.
Video Settings
I don’t mess with any of the tabs like Effects, Audio, etc. Just the video. If you select HD 1080p as your preset, then your dimensions should be 1920 wide by 1080 high. And you shouldn’t need to change anything there. Keep the frame rate at 29.97 as well.
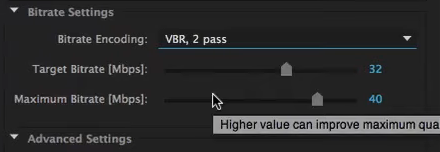
Down under the “Bitrate Settings” is where you set the quality and size of your video. Your objective would be to have the highest quality that you can while still having a manageable file size.
For the bitrate, I select VBR, 2 Pass, and set the target bitrate at 8 or 16 and the max bitrate as 40.
Related: Why Are My GoPro Files Broken Up?
Saving your Preset
I have a saved Preset called “VPM EXPORT” which consists of the settings I showed you here. So when I export a video in Premiere Pro, I just select my own custom preset every time, instead of going through all the settings over again each time I export.
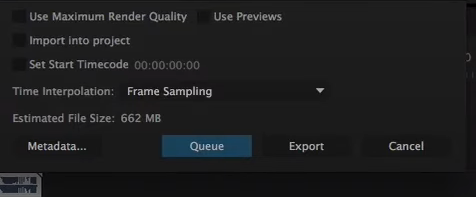
Once you have your settings all set, you can hit “Export”, which is what I do, but you can also hit “Queue”. That will export your video in Adobe Media Encoder if you have that downloaded and installed. There are a couple of benefits to that which I’ve outlined in my video.
If you got more questions about Premiere Pro, you can click here for more Premiere Pro tutorials!
VIDEO: Export GoPro Videos in Premiere Pro