Usually, the first thing people google after figuring out how to use the fun new Ricoh Theta S camera is, “How To Edit 360 Video”. Why? Because 360 Video editing is a little daunting and tricky.
Some product links in this post are affiliate links, and VidProMom will be compensated when you make a purchase by clicking our links. Read my disclosure policy here.
How to Edit a 360 Video?
It’s okay though! I will show you how to edit the Theta S video. It just takes a few extra steps, that’s all!
Before I forget though, have you seen these helpful resources on editing 360 videos?

Importing 360 Video to Your Hard Drive
First of all, you’ll have to import your 360 footage from the Theta Camera to your hard drive. To do this (I’m on a Mac), you’ll need to connect your camera to your computer through the USB cable. I don’t import my video via iPhoto, even though that will open automatically. I hate iPhoto!! I use Image Capture, which you can find on your Mac by searching for it (command+spacebar).
Here’s a little tip that I just learned recently. You can mount your Ricoh Theta camera like you would any external USB device by holding down the wifi button and the shutter button on the camera, at the same time that you connect the camera to your computer. It sounds like you’d need three hands for that… so good luck. 😉
Once you have your footage on your hard drive, you’ll need to edit it!
Edit 360 Video from Theta S
Once you import your footage, you’ll need to pull it into the Theta Application (which you can download here). The app will process the footage and stitch it together to make one flat-looking video that is edible. Without going through this process, you’d have two weird spheres that would be impossible to edit… or at least very difficult.
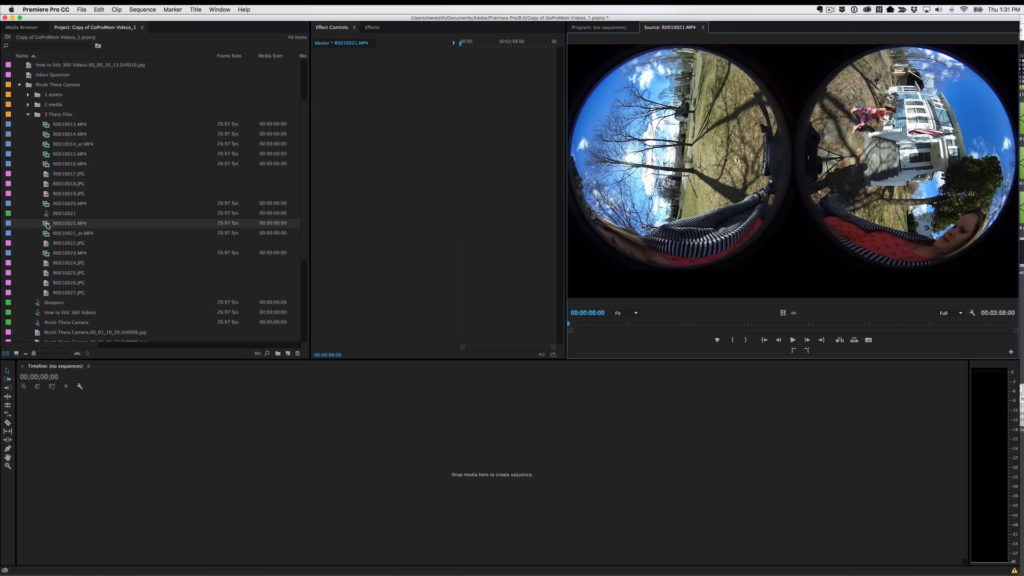
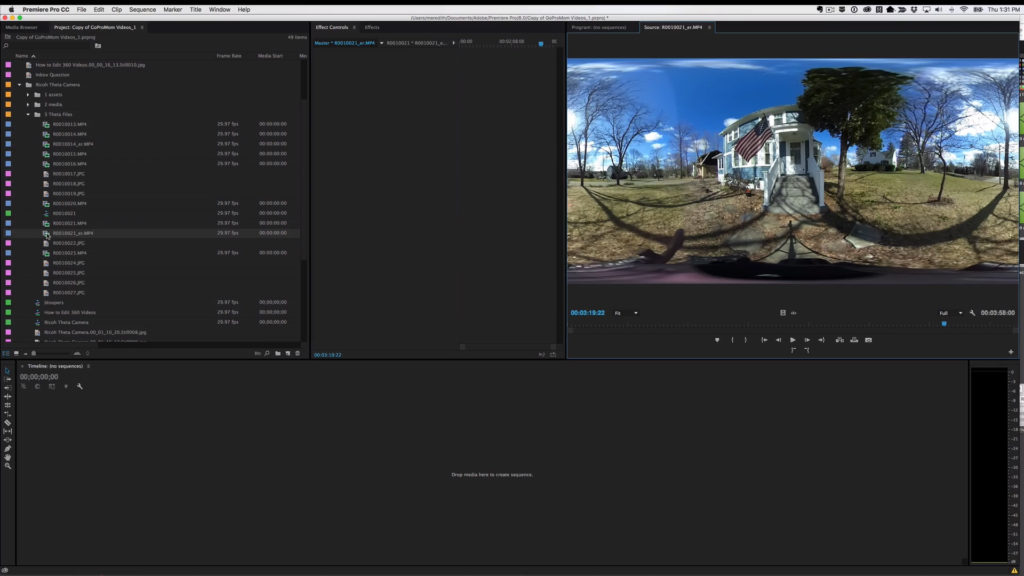
So with your footage stitched together and ready to edit, you’ll need an editing program that’s up for the task. The biggest hangup here is choosing an editor that can edit and export at the exact dimensions that you need–1920×960. Typically, a video from your DSLR would probably be 1920×1080. But the dimensions for 360 video from the Theta will need to end up being 1920×960.
Using iMovie
I first tried editing with iMovie, but it didn’t work quite right. You can import, edit, and export, but since you can’t select custom export settings for your video dimensions, your video won’t be a full 360 degrees. There will be a big ugly seam right down one side where the footage gets “stitched” together. If it’s the only software that you have, then it works “okay” but not quite.
Editing 360 Video with Premiere
Adobe Premiere Pro is my go-to video editor of choice. I edit all my blog videos with it and it works great for all kinds of video footage–DLSR, GoPro, and yes, even 360 videos from the Theta S camera! The downside is that you have to pay for Premiere through the Adobe Creative Cloud subscription. But it does the job extremely well, and it’s a professional-grade, robust editing platform. Download Adobe Premiere Pro here.
Edit 360 Video with Davinci Resolve
Davinci Resolve is a lesser-known video editor among non-professionals (like me! and probably you!). And guys, IT’S FREE. It’s actually used for advanced editing and color grading (something I know NOTHING about), but it makes a really, really great video editor. It’s flexible like Adobe Premiere Pro as far as export settings, so you can set custom dimensions, which need to be 1920×960.
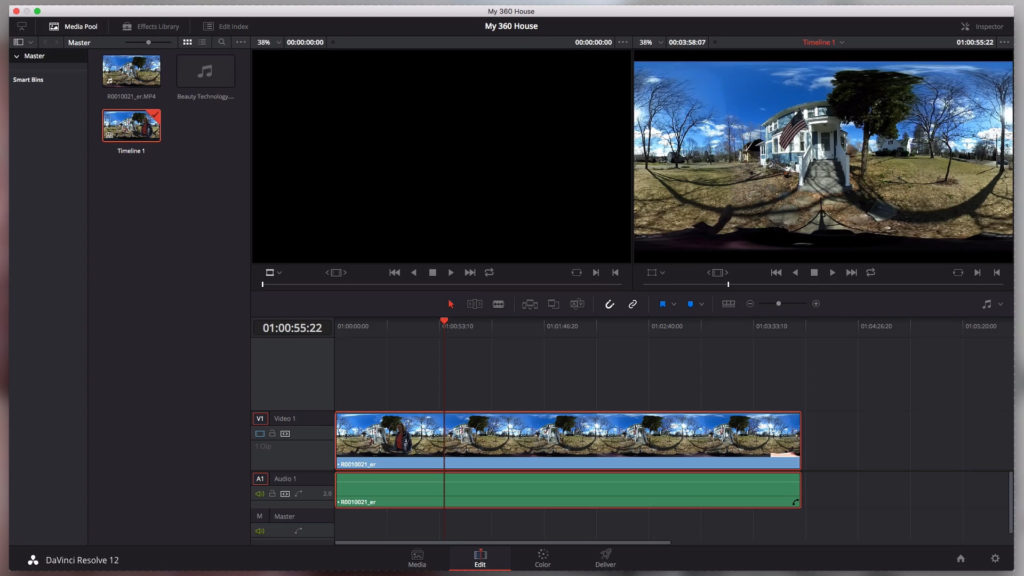
While Davinci Resolve does the job here and is pleasant to use, there is one downside. But don’t worry–it can be easily remedied! The downside is that you can’t export in .mp4 format. To fix this, you’ll export as a “.mov” file and then use a free program called HandBrake to convert it over to .mp4. Easy Peasy (it’s all explained in my video!)
Download DaVinci Resolve here and start using it for your 360 video editing! Did I mention it’s FREE?!?!
Before Uploading Your Video
You’ll need to use something called the 360 Video Metadata Injector.
Ummm… what???
I know… it sounds complicated… meta and data and injecting… but it’s not. Really, it’s not. See, when you’re done editing your 360 videos, and you export it like you would any video, it has to be turned back into a 360 video in order for YouTube and Facebook to display the video with the 360 controls. Otherwise, it would upload as a regular flat video, which is fine, but it’s not 360.
So the Metadata Injector simply imports a little bit of data into your file that tells YouTube or Facebook, “this is a 360 video! whoop whoop!!”. Well, it might not exclaim it quite like that, but you get the idea.
Download 360 Video Metadata Injector here for Mac and download here for PC. I explain how to use it in the video for this post! It’s a lot easy to watch it than read it…
All these extra steps sound a little daunting, don’t they? Here’s something to remember: 360 video is still in its infancy. This is a brand new type of technology, relatively speaking. So… relax. What you’re creating with 360 videos is AWESOME!! Seriously cool stuff, and thanks to YouTube and Facebook, the experience that 360 videos offer is amazing!